

Webhooks
Create a Webhook in the Merchant Portal and manage whether it is enabled.
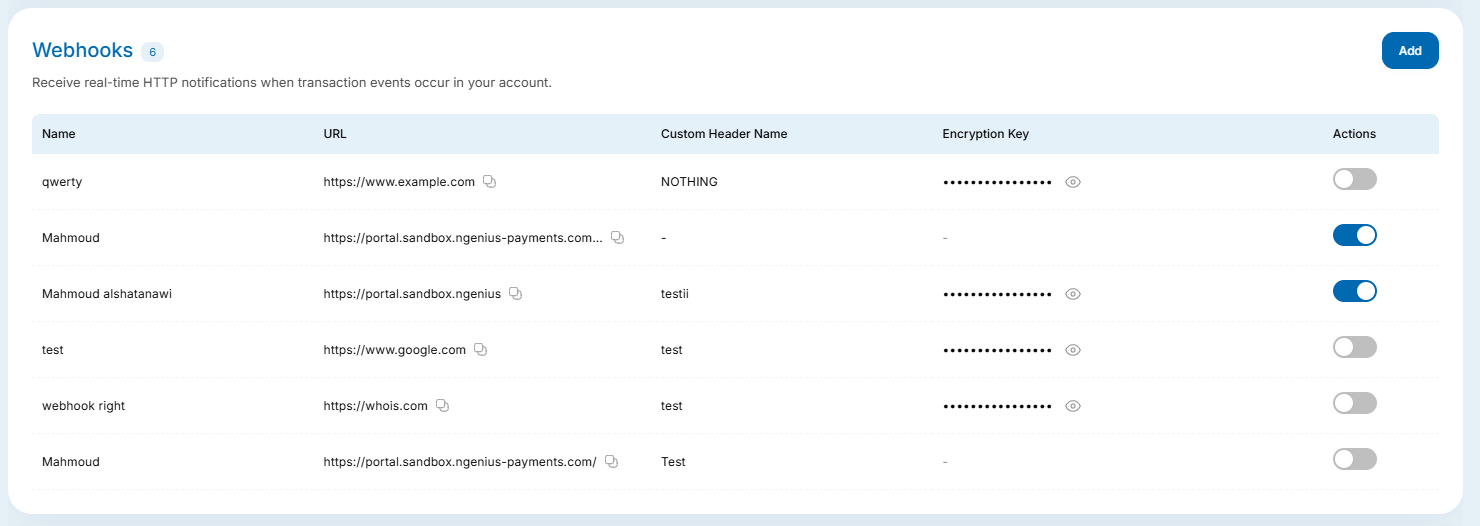
A Webhook sends payment information to a URL on your server. Choose a reliable destination: the Webhook service does not retry delivery. For event handling and delivery guidance, read Consuming webhooks.
Open Webhooks
- Select Settings from the left menu.
- Open Integrations and find the Webhooks panel.
Create a Webhook
-
Click Add in the Webhooks panel.
-
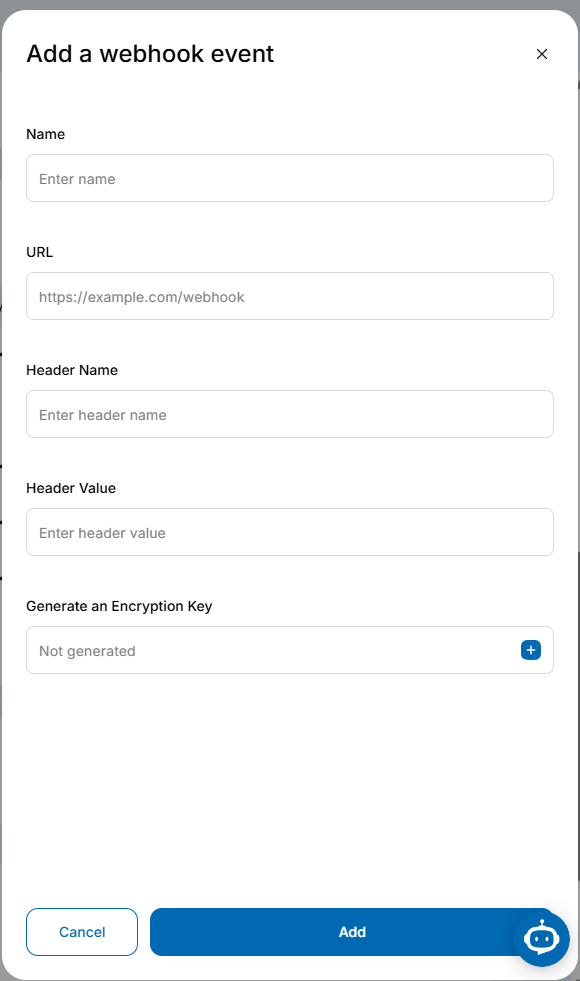
Enter a Name and the destination URL. If your server expects a custom header, enter its Custom Header Name and Value.
-
If you need an encryption key, click the icon in Generate an Encryption Key, then click OK in the confirmation box. You can create the Webhook without generating a key, but you cannot edit its key after creation.
-
Click Add to create the Webhook.
Enable or disable a Webhook
- Find the Webhook in the Webhooks panel.
- Use its enable/disable control to set the state you want.
The current Portal does not provide actions to edit or delete a Webhook record. Check the name, destination URL, custom header and optional encryption key before you create one.
To ensure a smooth and secure integration with Network International, we kindly request you to whitelist your webhooks. This step is essential for receiving webhook payloads and maintaining uninterrupted service.
Sandbox Environment:
For testing purposes in the sandbox environment, please reach out to [email protected]. This will enable you to experiment, validate, and perfect your webhook setup in a controlled environment before going live.
Live Environment:
When you're ready to transition to the live environment, send your webhook whitelist request to [email protected]. This ensures that your integration seamlessly connects with Network International's live systems, providing your customers with a reliable and secure experience.
Updated 1 day ago