

OneLink
OneLink lets you collect payments using a single reusable link. Use a fixed amount (e.g., tickets) or allow a customer-entered amount (e.g., donations). Each payment is separately authenticated, authorised, and settled.
OneLink
Collect payments through a single reusable link with a fixed amount or an amount entered by each customer.
- Fixed amount: Set a price customers cannot change, such as an event registration fee.
- Variable amount: Let customers enter an amount within limits you define, such as a donation.
Customers pay on the hosted payment page whether you share the link online or in person. Each payment is separately authenticated, authorised and settled.
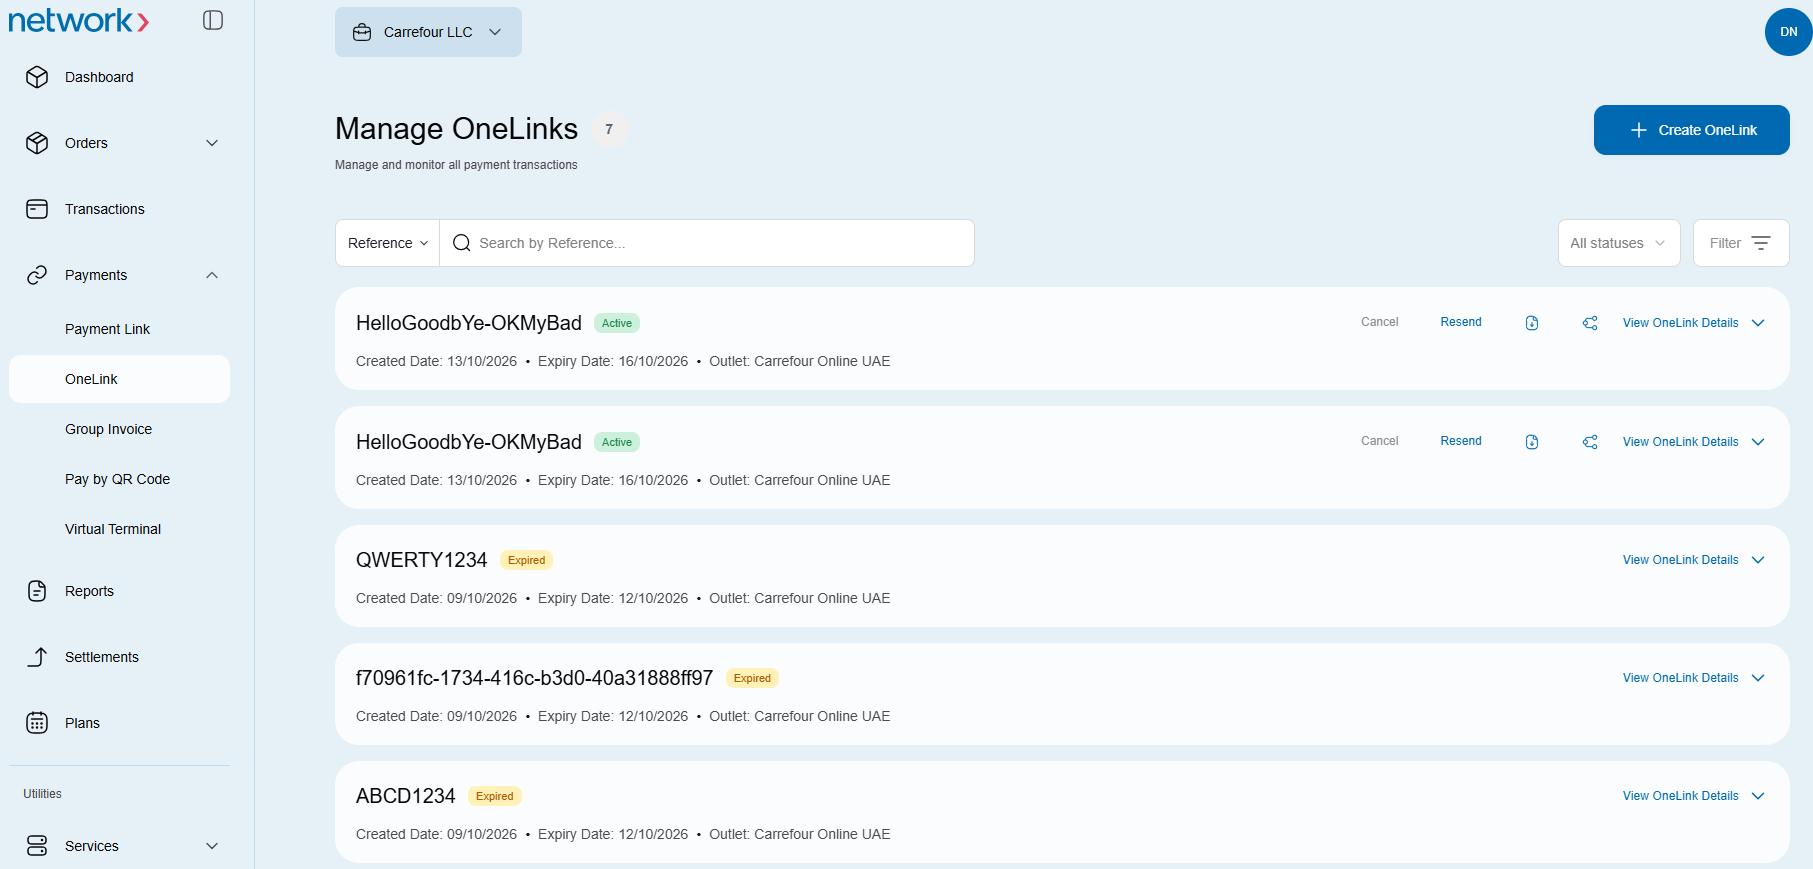
Create a OneLink
Open OneLink
- Sign in to the Merchant Portal and open Payments → OneLink.
- Click Create OneLink.
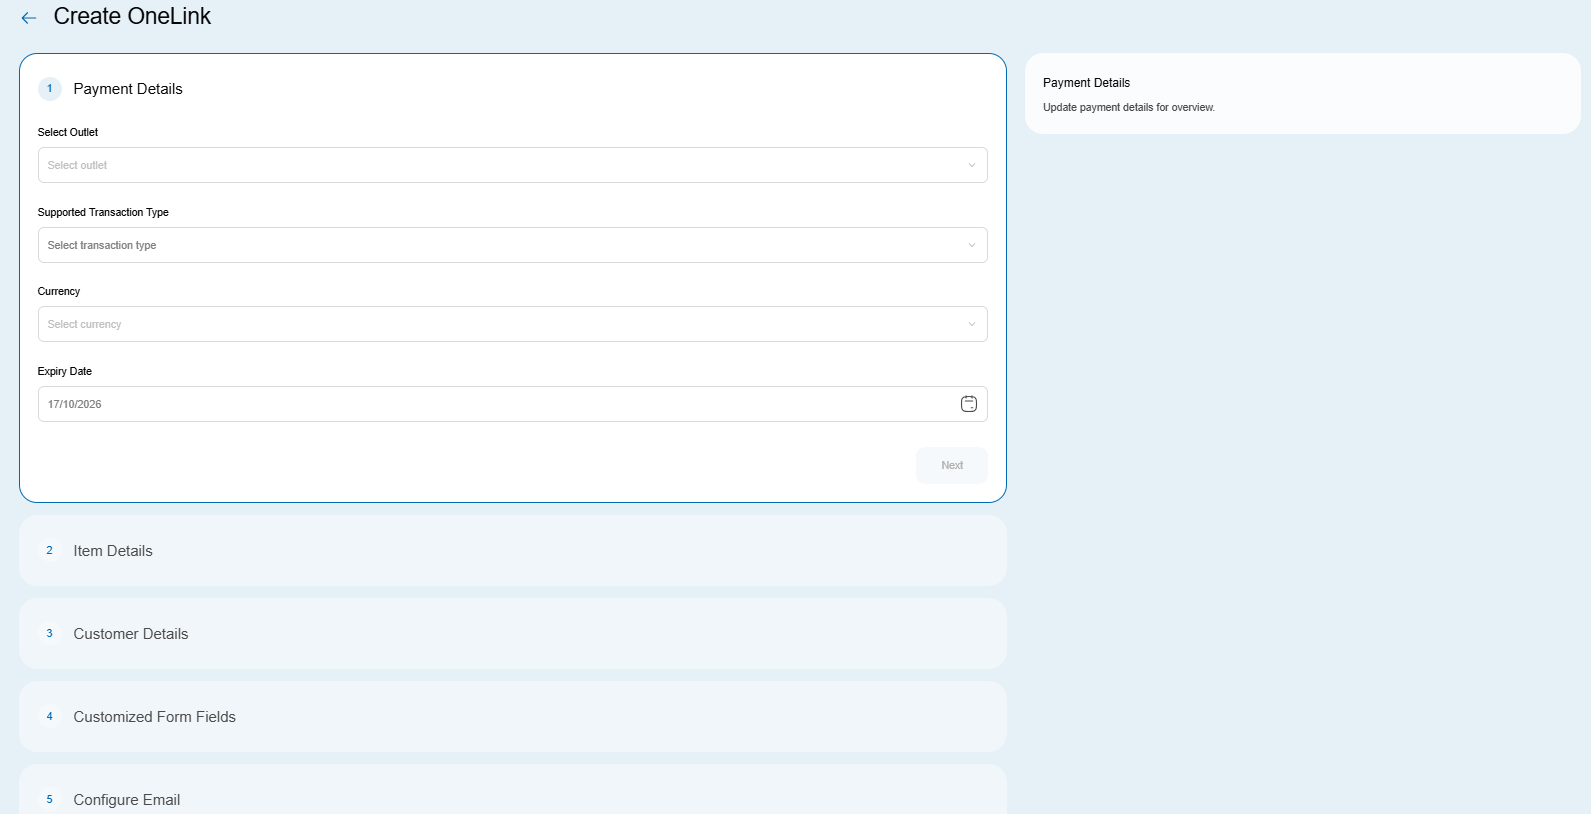
Payment Details
- Select an Outlet.
- Select a Supported Transaction Type.
- Select a Currency.
- Enter an expiry date, then click Next.
Item Details
- Enter a Description and Amount.
- For a customer-entered amount, turn on Editable Amount and set the minimum or maximum amounts. Leave the toggle off for a fixed amount.
- Click Next.
Customer Details
- Review Select Channel. Email is selected by default and cannot be deselected. To add SMS as another channel, select SMS and enter the mobile number in the field that appears.
- Enter the email addresses. Separate multiple addresses with a semicolon.
- Enter an Order Reference if needed, then click Next.
Customized Form Fields
- To collect additional information, turn on the custom-fields toggle and add up to 2 fields with your own labels, such as first name and last name. Otherwise, leave the toggle off.
- Click Next.
Configure Email
Use the toggle to choose whether to send email notifications when you create the OneLink. The fixed Email channel selection in Customer Details does not replace this notification choice.
If you choose to send email notifications:
- Select an Email template.
- Enter a Subject and Message. Type
{{in the editor to open the smart-tag selection menu. - Click Preview to review the message.
After completing the form, click Create OneLink.
Popular use cases
- Event registration: Share a fixed per-ticket charge.
- Charity and donations: Accept customer-entered amounts within your minimum or maximum limits.
- Hospitality (brunch or iftar): Collect pre-payments for groups or per-person charges.
- Classes, workshops and memberships: Collect individual fees without building a checkout.
Optional: Use OneLink in person with a QR code
Convert your OneLink to a QR code and display it at a donation box, event check-in, restaurant table or service counter. Customers scan the code and pay on their own devices.
Tips and notes
- Branding and sender: Review your logo, sender address and terms and conditions URL in Configuration.
- Templates: Prepare reusable email subjects and messages in Email templates.
- Expiry: Review the expiry date before sharing the link. For resend guidance, read Manage Payment Links.
- SMS: Read Pay by Link via SMS for text-message guidance.
- Sharing: Follow Share a payment link to copy or share your link.
Never request card details in chat or email. Customers enter payment information only on the hosted payment page.
Related
Updated about 22 hours ago